How to Lift Stamps
From Covers (and Reattach)
By Bill Weiss
This article presents information on lifting and reattaching stamps to covers. The two most common reasons to need to lift a stamp are to examine the grill or the watermark. To safely lift a stamp from a cover consider using one of the commercially available lifting fluids.
Several different brands of fluid are available and we recommend that you consult with your supplier for options. The product which I use is Lindner Stamp
Remover, which claims “Remove stamps without using water…..leaves no traces…..effortless – quick”. We will examine all of these claims.
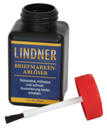
First, the bottle cap has an applicator brush attached to it so that in theory, you simply lift out the applicator, brush the fluid onto the stamp, and presto, the stamp can be lifted. Well, NO, that will not necessarily be the case, simply because the brush holds so much of the liquid that it literally soaks completely through the stamp and cover and stains them both!

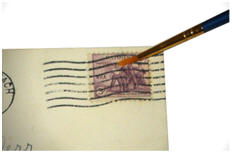
So the first order of business is to NOT use the applicator that comes with this product. Rather, I recommend using either a Q-tip or a fine camel hair small paint brush. It is far easier to control the amount of fluid by using either of these.
Dip the Q-tip or brush into the liquid, remove all excess so none easily drips from your applicator, then gently brush the liquid onto just the stamp, being careful not to allow the liquid to spill over the stamp edges onto the cover. The idea is to soften the gum on the stamp, allowing it to easily lift off the cover.
Sometimes the stamp will
lift off easily, but often, it will take multiple applications of
the fluid onto the stamp before a corner of the stamp starts to
lift. Do NOT try to force the lift by gouging your stamp tongs under
the stamp. Wait for the fluid to do its job. It will slowly start to
lift by itself and when it does, gently try to peel it off.
Sometimes it will peel partially, and then stick again. If so,
reapply over the stuck areas. When you can safely do so, peel it off
completely.
If you did not get fluid onto the cover by spilling over the stamp
edges, your cover should not be stained at all. You can then safely
soak the residue of old gum or the lifting fluid off the stamp to
facilitate examination. You can also replace the stamp in the
original position by using a glue stick or other commercial glue.
Sometimes, the stamp is merely hinged in its original position,
which has the advantage, of course, of allowing repeated
examinations of the stamp.
To reattach a stamp to a cover and the stamp is completely removed;
simply use a glue stick or any other type of commercial glue or
paste to reattach it. The primary concern is if the gum/glue
contains anything that could harm the old paper, otherwise this is a
safe method. Needless to say, you must be careful to replace it in
exactly the original position it came from so that any cancel “tie”
is maintained.
If only a portion of the stamp is loose, depending on the size of
the loose area, you can also use the method described above. But if
the portion is small, it is far easier to simply transfer gum from
another stamp, piece of gummed selvedge, or even a hinge, to the
portion with the missing gum.
Simply moisten the
selvedge or stamp then slide it onto the loose piece, apply some
pressure, then quickly slide the stamp/selvedge off the back of the
loose stamp, which should transfer enough gum to the loosened
portion to allow it to reattach easily to the cover by applying
pressure to it.
These are considered minor types of restoration which are ethically
acceptable in our hobby